![]()
The
Vac-u-Box:
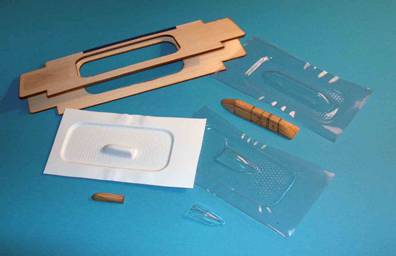
This product is designed to aid the casual modeler in reproducing aircraft
canopies, small parts, and other model parts by vacuforming them.
*******************************************
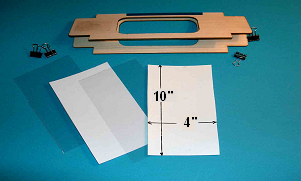
ORIGINAL VAC-U-BOX
4" X 10" WORKING AREA
Remember, Please allow 2-4 weeks for delivery
*******************************************
MINI VAC-U-BOX
This box was created by public demand. Modelers have asked and emailed about a smaller box specifically designed for building 1/48 & 1/72 aircraft canopies. So I have scaled the original Vac-u-Box down just for them with a 2" X 4" working area.
Remember, Please allow 2-4 weeks for delivery
.
*******************************************
Hints and Tips
Vacuum-forming is
something that requires some experience to do properly every time, but it is
quickly learned. You will rapidly learn how much “sag” you need for any
given combination of material and subject. Further, if the object does not mold
properly, the plastic can be simply be re-heated and used again.
The
Vac-u-Box can
use any thickness of material, but anything over .030 requires a considerably
longer heating time and could therefore cause the wooden frame to warp.
Clear material
(which is usually vinyl) needs less temperature than does styrene, therefore, it
is ready to mold with less heating.
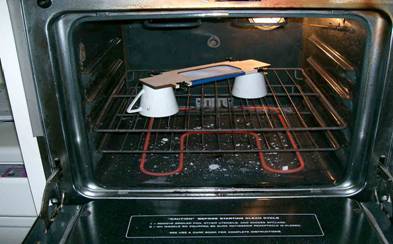
Heat sources can
include an normal oven, a heat gun (but be careful to heat the sheet evenly), or
even a stovetop, but be very careful of the fingers, be sure to wear gloves, and
remember that the Vac-u-Box is wooden.
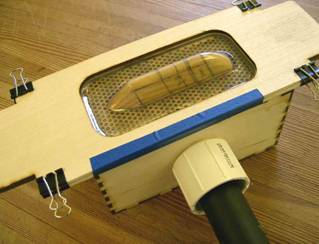
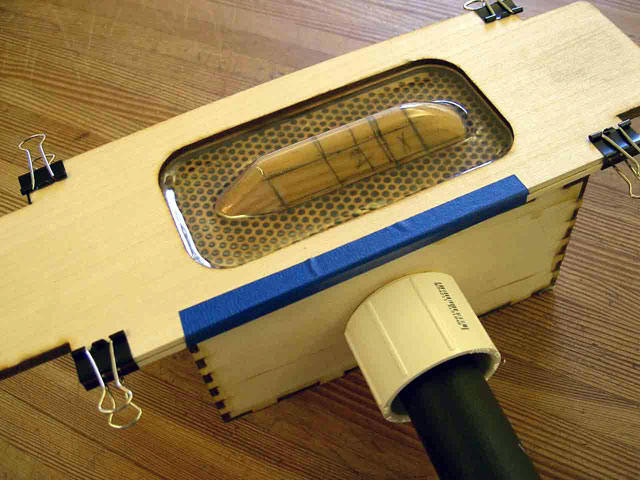
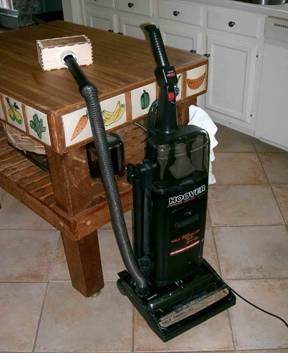
Virtually any vacuum cleaner that has a hose attachment can be used. If the hose does not make a tight seal, simply add masking tape around the hose wand until it does not leak.
Procedure:
2.Cut desired plastic into sheets roughly 4 inches by 10 inches.
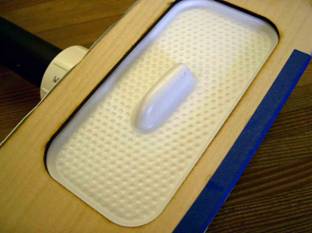
4. Add about 1/8” spacer to raise the object above the bed to allow for proper forming around the base of the object.
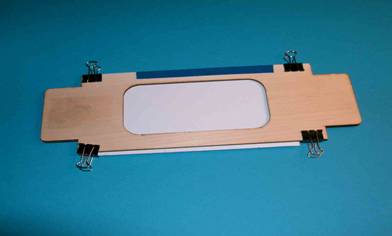
5.Fix the object to be molded in the center of the perforated base of the Vac-U-Box using something tacky or simply double-folded tape. (This maintains its center position and prevents it being moved during molding).
6. Heat the plastic until it begins to sag evenly in the holder.
7. Turn on vacuum cleaner.
 .
.
9. Turn off vacuum cleaner and remove holder.